Thursday, 28 January 2016

Glam Slam Repairs

In a diversion from my usual sewing posts,today I'd like to offer inspiration on a little shoe glamour.

Do you have a pair of washed up shoes that you really don't want to throw out? What to do?


 I'm really not sure how the colour wore off the heels of my beloved gold sandals and thought the only way to repair them would be to spray the heels. What if the gold shades didn't match? Hmmmmm.


The answer came when I found a fab tutorial by gorgeous vintage loving Sussex belle Miss Amy May who has written a wonderful and very informative post on bedazzling which gives a step by step guide to jazzing up your accessories - especially shoes!


As a guide it took me about an hour per heel to sashay up these gold glam pots but you DO NEED to make sure you use a wax pick  to pick up the stones (available on ebay for around 99p for 3) and a strong glue that dries clear- that's really about it- oh, and use a small receptacle for the rhinestones too as you can shake it around to get the rhinestones the right way up.  Don't worry if you think the stones seem to disappear under a sea of white glue as you are sticking them on, they will come out super sparkly once  the glue dries.


So really that's it.  A once treasured pair of shoes, almost destined for the bin, now given a new lease of life. 


Well, what are you waiting for - go bedazzle.

Daisy xx


Tuesday, 20 October 2015

To Japan, well kind of .....

Japan is the one place I have a passion to visit, but due to current lack of readies, I decided to do the next best thing, and sew a little piece of this fascinating country.

Have you guessed yet? 


Of course, a kimono. A Named Patterns Asaka Kimono to be precise. 

However, gorgeous as it may be, the downside (for me) is , this was a bit of unselfish sewing as it was a present for my daughter in laws birthday, so no wearing this gorgeous piece for me!


However, a bit of unselfish sewing never hurt anyone. Check out that lotus flower style design. This fabulously Japanese-like fabric was an excellent find from fabric heaven Ditto in Brighton. The story  behind this beautiful print is that the design was purchased in Paris and the fabric was printed in Japan by the factory that makes liberty fabrics for the Japanese market.  I do love this story and love the fact that this fabric has a story behind it.


My very favourite part of this pattern is the sleeves which, when you lift your arm, have been designed so beautifully, they're like an oriental butterfly. The pattern allows for extra fabric on the sleeve vent so it's not merely a hem where the sleeve seam is and makes the garment hang beautifully. Of course you do need to use the right fabric and this example was from a light to medium weight cotton lawn style material , vey libertyesque. 


The most taxing part of this make is the collar band, joined at the centre back to make a long piece to work with. If you do choose to make this garment, I'd recommend using a walking foot on the collar, as the first time I made this kimono, I made it from satin and used a regular foot. Much swearing ensued as the slippery satin refused to align. No such problems with this make though using my trusty foot, and once the collar band was attached it was merely a case of some careful top stitching on the right side to ensure neatness. 


Neatness continues inside in the form of French seams, perfect with a lightweight fabric.


The pattern itself contains six main pieces - front, back, upper and lower sleeve, collar band and belt so it's not a difficult pattern for a seamstress with some experience. You can also sew belt loops but I went with looped cotton belt carriers on this occasion. 


As I was slightly short on fabric the inner collar and inside of the belt was made from black cotton, which seemed to work really well as a contrast. 


Finishing off I made the effort to tie the belt in a very geisha like bow. 

Now, where's my hair chopsticks? 

Basics:  I used 2.2m of lawn/cotton plus 30cm for the collar band and belt lining.

Pattern: 10 euros from Named Patterns. 

Happy sewing

Linda x


Wednesday, 15 July 2015

Fools and Fabric

What's in a title?  Not what you'd think for this blog post as the Fools and the Fabric are really a bit of alliteration aside to the main matter.


Really it's about a home made dress but let's start at the beginning when I purchased some green hawaiian type lycra print from Birmingham Rag Market.  The fabric lay - unloved - in my stash for over a year - I wasn't even sure about the colours.  Then I found the ideal pattern in my other stash - the Burda Magazines. Pattern number 109 from Burda February 2013 was the ideal vehicle -  finally,  the perfect meeting of pattern and fabric.


It's not always so easy to find a good pattern for lycra fabric, specially when you want something glam.  However this pattern seemed ideal with it's gathered shoulder detail.   The pattern itself is unusual in that there is no shoulder seam the should piece is an extension of the back.  The original pattern had only one gathered shoulder but I hacked it to give both shoulders gathering as I felt this gave the garment a more vintage feel and suited my personal style.  ... and I do love a bit of hacking:

Here's the back view to show how the back of the dress continues on to the shoulder:


Now to the fools bit -


Fools because the dress got its first wearing on a night out to an "Only Fools and Three Courses" dinner.  Do you think the dress has a good background against the Trotter's van? Mr P being a bone fide Fools and Horses fan we couldn't miss out on this evening and as it meant no cooking for me I was double happy.

I even got to meet Del Boy after the show, complete with dodgy wares!


Enough silliness.  Now to the Fabric part of the post.  I decided to wear the dress for my annual material shopping spree in Athens. I feel if I wear a me made it serves as a good luck charm for finding lots of nice fabric.  I'm pleased to say it worked.  You can make out three of the shops in the background  there's about another nine in the area - fabric heaven.


The dress was actually pretty easy to make - if you want to give it a go it's from Burda February 2013, number 109.  The basic dress contains only three pieces - a front and two backs, but mine contained six as I lined it with itself.  I added in some gathers at the bust and to give it a vintage sweetheart neckline.

The basics:-

Ease of sewing - as it only has three pieces it was easy to sew but take care if you use lycra - it's a slippery character.

Requirements - 1.5m of fabric - you'll need a stretch fabric for this one.  I had the fabric so long I can't remember how much I paid for it!!

Happy Sewing and Happy Holiday Time

Linda x


Wednesday, 27 May 2015

Its All About Tea


Well that was a long tea break - more like a hibernation really - but that's the British winter for you.

My poor old blog has been a bit neglected due to my sewing up a storm over the winter months and all sorts of fun things I'd planned in my calendar.  I've also now decided on a blog overhaul to take in other interesting stuff - like Tea! - so it's not just a diary of my sewing makes and will hopefully  appeal to other readers where ever they are in the world.

Being a quintessential English lady, I live up the rule that all non Brits they think if you're British you must be awash with tea.  Guess what - its all true.  There's nothing like a nice cup of tea, Earl Gray being my particular preference, especially when it's served out of some vintage china and with a smattering of cakes. 


With tea in mind I've produced the perfect Afternoon Tea skirt (as opposed to the Tea Dress) and am pleased to say that it was well received on it's first wearing for a spot of Afternoon Tea in Kemp Town's The Tea Cosy - a truly delightful and eccentric place to take tea.


I'd heard lots about this place, all good, and being on my doorstep it seemed silly to pass up the opportunity to sit and drink tea in some delightfully eccentric surroundings whilst munching on scones and cake.


The walls of the Tea Cosy are covered in all manner of royalist memorabilia, started off by the previous owners who intended it to be a shrine to the late Princess Diana.  Everywhere you look there are newspaper print outs, commemoration mugs, tin signs, tea towels and even a life size cardboard cutout of Her Maj.


We'd decided on afternoon tea but on arrival discovered it needed to be ordered in advance so, instead, settled for the Princess Diana High Tea including a selection of sandwiches, cakes, scone with accompanying conserve of your choice (I had salted caramel) and of course a pot of tea. 


All teapots are refilled and fitted with their own little hand knitted cosy


Here's some more views of the interior - how cute?

So, here's the sewing bit.  The teapot fabric is from the usual emporium Fabric Land and at a width of 110 cm just needed enough to create the length twice - a front and a back and a waistband.    I previously had serious issues trying to work out how to do the pleats (yes, pleats, not gathers), but had a brainstorm moment and deciphered that, for each piece,  if you deduct half your waist measurement from the fabric width (i.e. 110 cm minus 40 cm) then you just decide how many pleats will fit nicely into the remainder (i.e. 70 divided by 12 equals 5.8) then each pleat and spare in between gives you the 5.8 cm to work with so your pleat could be 1.5cm - that is a triple fold where the fabric folds back on itself and a bit to spare - the in between  (remember to allow for seams!)  Sorry if this sounds a bit complicated.  Annotating maths isn't my strong point!


So, if you need a pick me up, a tea skirt and a cuppa are your best bet.  Find out where your local tea emporium is and head off there dressed appropriately.

Details:

2 skirt lengths of fabric. This one was 110cm wide and the skirt 60cm long so 1.2 m plus some for waistband . A metre and half should cover it.  Plus button and zip.

Simples

Happy sewing

Linda x


Friday, 1 May 2015

Me Made May 2015

Yikes, where did that 11 months go?

It doesn't seem so long ago I signed up for my first ever Me Made May in 2014 and in a flash, was feeling a little lost at not being able to share daily garments with worldwide friends when it came to the end. 


So, I'm glad it's back and thank you to Zoe of So Zo What Do You Know for once again organising this fantastic challenge.


I'm really looking forward to digging out those old me mades (and a few recently me mades) and challenging myself to wear them in whatever form that may take.

Last year gave me a glut of ideas and I promised myself I'd make more cozy separates, T shirts and comfy lounge pants .......... and then I morphed off down a vintage side street of crazy fabric, big skirts and wiggle dresses, so I still have that to do.  Who know's what I'll discover this year. 


Go on, give it a go, you know you want to.

Happy sewing

Linda


Thursday, 30 April 2015

The Call it Melon Yellow

It's been an unfathomably long gap since my last blog post - maybe my blog has been hibernating since Autumn and has now decided with the arrival of Spring and some warmer weather, to poke it's head out over the parapet.

So for my first comeback post, what better than a truly Spring-like dress than the Melon Yellow and a flurry of petticoats to celebrate my comeback.


Since becoming more interested in vintage fashion whilst reading some awesome blogs last year, I decided to have a go at creating my own patterns to make my own vintage style clothes.  Armed with the trusty Metric Pattern Cutting by Winifred Aldrich I set about making some blocks for my reasonably petite frame.  - Ahhh, that's why I haven't been blogging, I've been fiddling with paper, a cutting board, a French curve and a lot of pins!

This fab fabric is from my usual emporium of all novelty fabric Fabric Land Brighton.  The bodice of the dress is a simple sleeveless fitted dress block which I gave myself the challenge of scalloping at the neckline  - a time consuming and fiddly detail.  I actually missed a small dart in the back neck so the bodice gapes slightly - note to self - remember all darts!


The skirt is a full circle skirt which gives it a feminine 50s vibe .


So if you want to make a circle skirt here's the workings out, It only took me one lunch hour!

Use your waist measurement as the circumference. So  tp find the radius we need to go back to math lessons and find divide the circumference by 2 Pi (Pi being 3.14), this gave me 6.28, and that divided into 29 gave me 4.6 as the radius. (P.S. my workings out are in inches as I don't have a 29cm waist).

I added extra inches in so I could gather the skirt to give ir more fullness and made the radius 7".

Once i'd got that measurement i added in from the edge of it the length i wanted the skirt to be ( in this case 24") and then drew in the circular shape to match the radius.  From that i was able to calculate how much fabric i needed for the skirt and just to confuse you, I worked it out at 3 metres. The extra metre was, of course, for the bodice.  


Maths lesson over, here's another pic of the finished dress.


Even more fun, here's what the dress was made for - a twirl on the dance floor (excuse my very strange expression - i was concentrating on my moves!)


So there you go, they reasons why I neglected my blog -  I've been self-drafting and learning to jive.

Give either, or the two of them, a go - they're both fun!

Ease of sewing:  Bodice not so easy with the first draft but once you get this boxed off you can create all sorts of bodices.  The skirt, much easier as it's a full circle skirt so if you're good at maths shoudl be a doddle.

Need: This dress takes 3.5 metres of 110cm wide fabric plus half a metre for the bodice and a long length zip.

Go on, dance the night away

Happy sewing

Linda x


Thursday, 16 October 2014

Greece is the Word

Another country, another fabric haul.   A slightly different blog post this time to give you a flavour of Greece and the beautiful island of Karpathos.

After a long summer full of hard work a September break was just the ticket for a tired dressmaker and I was really looking forward to dipping my toes in the sun warmed Aegean Sea and chomping some fabulous Greek food.

Lefkos Beach - clear and shallow waters - perfect for families
Our destination was Karpathos, reached via little flight from Athens (or a 9 hour ferry journey if you have a the time).  Karpathos, unlike it's bigger neighbours, Rhodes and Crete, is very untouristed and is perfect for relaxation.  The mountainous scenery is very dramatic and the beaches or even populated areas contain very little if at all, in the way of bars and music.  Activities centre around beach lazing and taverna eating yummy Greek food.
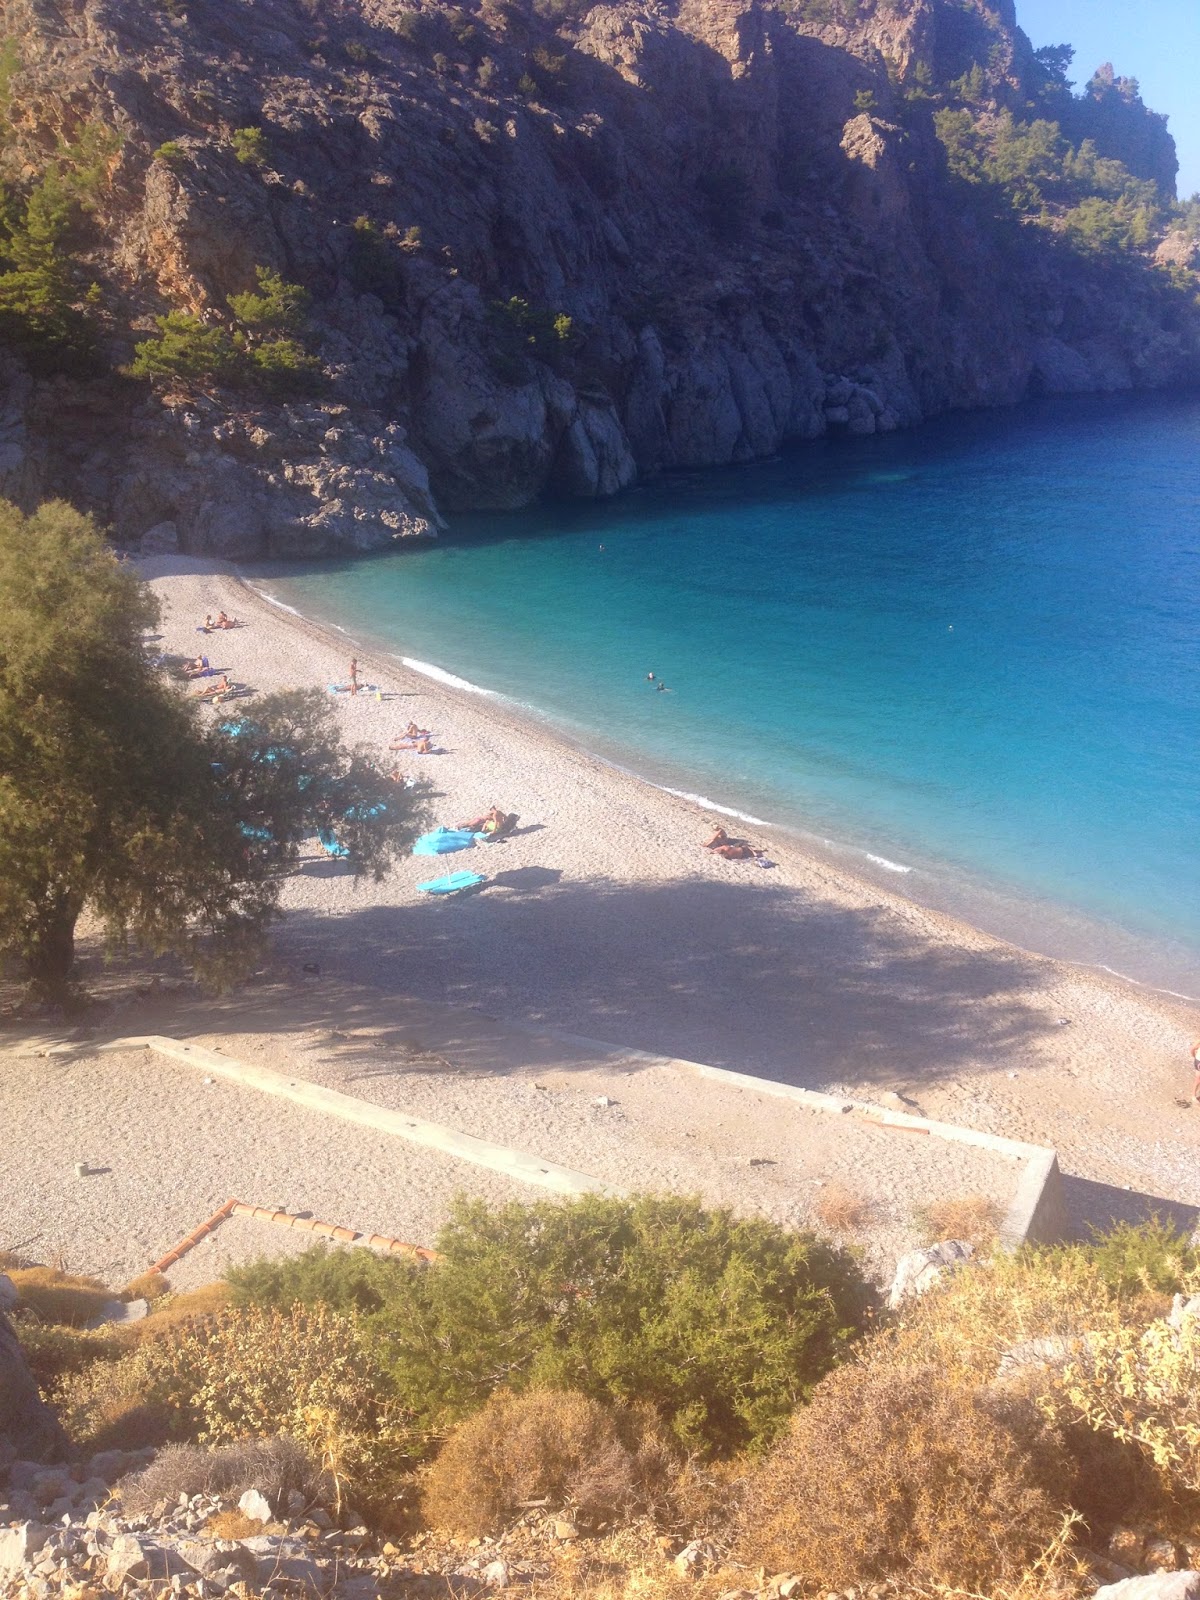
Achata Beach - pebbly with crystal water
Accommodation and car hire is priced moderately and we made the most of exploring a different beach each day. The one above had one small taverna - enough for lunch, and beautiful clear deep water for swimming.


Appella beach just had to be my favourite and is considered to be one of the most beautiful in the Mediterranean - something I can vouch for.  The road to reach this secluded paradise beach was hairy, requiring concentration for the hairpin bends and sheer cliff drops but was more than well worth it.


Glaros beach is breezy and has nice waves and a taverna with rooms of the same name where you can feast on the best Greek food.  I managed to wear my old me made strapless dress this day.


This shop in the main town, Pigadia, was a cute find and I did a bit of shopping at 10.00 pm on the day I was there.  It's a knitter's dream.


Popi's Studios in Arkasa where we stayed had an interesting car park entrance and great studio accommodation at a very reasonable price.

So, after our days of relaxation it was time to hit Athens for a spot of retail therapy.


Obviously, yours truly headed to the fabric quarter which can be found just off the main shopping street (Ermou) in a little road called Kalamioutou.

There's easily about 15 shops there with varying fabrics and something for every pocket.  It was kind of difficult to control myself but I managed quite well, only netting about 9 pieces of cloth in varying sizes for about 85 euros.

Said cloth
The yellow check taffeta was an astonishing 2 euros per metre so I bought 3 metres for a vintage style dress.  In the top right hand corner is some gorgeous Japanese style stretch cotton and my other favourite is bottom right, a heavy cream shaded wool with gold slub - perfect for a winter skirt.  The most expensive was the copper brocade at 18 euros per metre so this concoction will have to be thought about wisely before cutting ensues.  Mr P even gained 2.3 metres of striped brown wool for some 1940s trousers.


Yes, Athens definitely has a slice of fabric heaven.


So many rolls!  fortunately for Mr P there are lots of lovely little bars and, when you do get hungry, restaurants nearby so fabric shopping to your heart's delight if you're with your non-sewing other half, if definitely a possibility!

 
Karpathos resident
This shop in Ermou Street had a mind blowing amount of buttons.

Well methinks now I have a respectable amount of fabric to see me through winter sewing days, but have already booked next year's flight so that I can stock up on fabrics and have more Greek Island relaxation.  Who knows what material goodies will be on offer next year.


A final 2014 memory of Greece to keep me going through the winter months.

Happy sewing

Linda x