Showing posts with label sewing. Show all posts

Thursday, 1 November 2018

Debi & Daisy's Cape Crusade

Well, it sure has been a while since my last post due to, amongst other things, the Blogger app becoming incompatible with my iphone so it really was too much hassle to try to post anything.  You'd think in these days technology would keep up!  However, it's finally managed to catch up and I have a little more time in my schedule to post so, hopefully, there will be some interesting reads coming through on a regular basis.


So I thought for my first post back I'd make it a worthwhile one and have teamed up with Debi of  Ms 1940 Mccall for a fun sewing group challenge.  Debi has a wonderful blog dedicated to sewing up vintage patterns from 1940,specifically McCall ones. She's sewn a whole heap of wonderful garments and has the vintage style nailed.   The plan is to inspire sewists to make a cape - something that'll be very welcome after the British Isles  turning the weather dial to "flippin freezing" this weekend.  I was very excited when she liked the idea of a Cape Sewing Group and I know Debi is too, so we hope you'll join us on our Cape Crusade journey, be inspired by each other's makes and get yourself a stunning piece of memade clothing to boot.

Of course, Debi and I will be participating too for the fun of it - she has already sewn up the most delightful cape "suit" consisting of cape, skirt and blouse which you can see here  for some inspiration.   Just make sure you check out the awesome cape lining - it's dreamy.

I plan to get full on sewing the 1930s Capelet (here ) and below from Decades of Style .  I just love that high collar, the floaty back and the angles on it.  I plan to style it up with some long gloves for a glam look.  If you'd also like to sew this cape then Decades of Style are offering 20% off their patterns at the moment - just pop by through the link on their Instagram page and you'll see the code.  Better hurry though as it's only applicable until the end of this week (that's week commencing 29 October).

Now for the good bit.  As well as taking part and hosting,  Debi and I are offering two lucky sewists the chance of winning some goodies.  Debi is offering a vintage cape pattern whilst I will be throwing in as a prize a metre of 30s inspired crepe de chine that I purchased in Athens during my recent trip there.


The fabric would make a perfect sleeveless blouse - maybe with a vintage pointy or a mandarin style collar; or perhaps you'd prefer a basic shell top, maybe with back buttons, to jazz up your winter suit.  We'll be judging the entries at the end of the challenge and, remember, there are two prizes so there will be TWO winners.  But, hey, it's not just about the prizes, this is a sewing group for fun, so we think it'll be good to follow along the sewing journeys of our Cape Tribe to see what fabrics you have picked, and how your construction is going right up to the styling up of the end product.  The prizes are available to anyone who'd like to take part, wherever you are, so get your thinking cap(e)s on and let's see your ideas.  There's no timescale on the actual making up of the garments, as in this week you do this bit and next week you do that bit, and as it's not a sewalong you can go at whatever pace
 is good for you.  The challenge will run until 2 December so that gives you plenty of time to dip in 
and out of sewing up the garment  - and we'd love to see your construction pics too.  We'll then pick the winners and wing the prizes on their way.

Of course there are few rules for participants.  Here goes:-

1.  Follow both  ms1940mcall and daisycreatesinsussex on Instagram
2.  Repost the notification post 
3.  Tag a friend who you think would like to join in
4.  Tell us what fabric you'd make your cape out of (and the design if you have one in mind).

Then just tag your posts #debianddaisyscapecrusade so we can follow along with you and everyone can see your progress.

Happy sewing Capemakers.   xxx


Sunday, 28 February 2016

First 2016 Sewing Resolution, Ticked Off

I do love an online sewing challenge, when I have time to take part,  so when House of Pinheiro threw down the gauntlet on Instagram for Sewvember  it gave me a kick in my proverbial design butt to put a coat on my project list for 2016.


This is NOT the coat I made, sigh, but the coat I was inspired by.  As luck would have it, my local fabric atelier More Sewing had the perfect coat fabric in one of my favourite shades at a bargain price - some knitted boucle slightly stretch knit in a fabulous sage colour.  The sewing gods were sprinkling their stardust on me.


I'd already pre-picked the garment pattern from my Patrones stash in issue 272, pattern number 42 - a vintage style fit and flare knee length coat with lapels, pockets and cuff detail. Not wanting to overspend in case of non wearability I dug out some dark lining from the loft (my other secret stash place) and set to work with my Christmas prezzie - aka my new Fiskars dressmaking shears .  The design is straightforward; 2 X centre back pieces, 2 X side panels and 2 X front pieces. Add to that lapel collar, facings, pockets and cuff trim, oh and 2 piece sleeves.


Stitching up was relatively easy with no awkward darts to consider - just some nice princess seams.  The fabric looks like boucle but is in fact a medium weight boucle lookalike knit - hurrah - no fraying seams and not even any need to overlock. It turned out to be the perfect coat material (well almost, but more on that next).  Note to self - ask Mrs. More Sewing what this fabric is, it's a dream to sew.  

So, I started on the stitching up , then ...... Disaster!!  The centre front on one side was cut from fabric that had faded.  There was no covering this up and I knew it had to be recut from a fresh piece of fabric so I hotfooted it back to the shop, where a replacement piece was supplied with no hesitation.  Obviously this was a supplier /manufacturer fault as the fabric had been correctly stored by both myself and the store.  Great service by More Sewing and to be thoroughly recommended.


Minor glitch sorted I ploughed on with the project and I'm happy to say the garment sewed up beautifully, and that included the lapels which I thought might give me trouble as the fabric is a bit thick when working in layers.  


The next conundrum was the pockets - patch in this case - how to attach them to the coat.  Not being keen to top stitch them on - the stitch line most likely goes wonky with thick fabric - I consulted my IG sewing friends and decided to go for hand stitching, very neat hand stitching that is.  This worked well and I think the plushness of the fabric helped to hide the stitches.  I also attached pocket flaps and, not being keen to throw a wobbly buttonhole, went for a snap fastener with button decor in the relevant place.  All good. 


After a full lining and hand stitching of the hem, all done prior to starting my new job and at a snail's pace due to attention being diverted by Everbody Loves Raymond and Frasier (perils of morning sewing) the final detail was added. I think these little cuff details really add something to the coat, after all, how many times have you heard: it's all in the detail?


The lining was an easy addition; such a relief as previous jacket makes have had that problem where sleeve and lining don't completely match - practice must be paying dividends. 


I pondered a while over buttons and even ventured out to my local thrift shop to buy some "suitable" fastenings. However, in the end I decided to go for three large vintage buttons I already had on my habby stash; I was so pleased with the finished effect, I almost want to make something else so I can vintage button mix again. 


Finally, I ran up a furry scarf from a small piece of faux fur to add some warmth and a little glamour to my new coat. 


It even withstands strong winds


All in all I figured I've had coat success in one of my 2016 projects and can now give myself a great big fat tick on the list.

As fierce details - suffice to say I can't remember the exact price of the fabric , maybe somewhere in the region of £10. It's 150cm wide and took 2.5 metres. 

The coat came in around £30 and I've already got loads of wear out of it, so, bargain!!!

Well, what ya waitin for? Get sewing a new coat before the cold weather comes to an end. 

Happy sewing. 

Linda xx


Tuesday, 9 February 2016

Flutter By in Yellow


Sometimes you just find the perfect fabric.  Then you realise it's not gong to be that easy to work with. What's a seamstress to do?

Well this fabric find was from my local and l loved it so much that, after buying it in yellow, I went back for more and bought a length in fuschia.  It even got its own feature in Issue 18 of Love Sewing magazine.


So, nuts and bolts - the pattern I used.......

After some not insignificant amount of time spent thumbing through my vast pile of Burdas and Patrones I settled on Burda January 2014 pattern 108. 


The light to medium weight of this manmade fabric, coupled with the drapeyness, called for something that would show off its qualities. 


The most interesting aspect of this pattern is the shape of the pieces whereby the back folded around towards the front to form a batwing sleeve. I'd never worked with this pattern shape before and it was fine whilst I could play around with the fabric on the floor - the challenge was when I picked it up to sew the folds together.  Think draped origami and you get the picture.

After a not inconsiderable amount of folding, unfolding and re-folding I managed to get the pieces in alignment.  I actually did this inside out, i.e. right side to right side, as the fabric has a "high frayage" factor so I wanted to french seam them - indeed, I love a sewing challenge.

The main body of the top complete, it was time to attach the hem band and, joy of joys, no hemming of this seriously slippery fabric as the band is folded in half - more origami - and then slip stitched to the main body.


All in all, not an over long make, and and I felt well worth it to have something a little more unusual in my wardrobe.  It also turned out to be a useful travel wardrobe addition - not only because of the non crease fabric but also because it's so light and airy to wear typically in a hot climate, as evidenced below during a fabric shopping spree in Italy. 


Now to find a further suitable pattern for the pink variation of this cloth that I bought.


I love to style this garment in an oriental fashion, hence  the hair chopsticks, and it's also versatile enough to dress up or down, feeling equally at  home with a pencil skirt or jeans.

You can also read a write up of this pattern in issue 19 of Love Sewing Magazine as it was one of my Pattern Picks.


If you fancy something a little different, give it a go.  The pattern is available for download from the Burda website.

Difficulty rating - you need some sewing experience and patience to figure the folding. 

1 metre of 150cm width fabric, the drapier the better.

Happy sewing.

Linda x


Thursday, 16 October 2014

Greece is the Word

Another country, another fabric haul.   A slightly different blog post this time to give you a flavour of Greece and the beautiful island of Karpathos.

After a long summer full of hard work a September break was just the ticket for a tired dressmaker and I was really looking forward to dipping my toes in the sun warmed Aegean Sea and chomping some fabulous Greek food.

Lefkos Beach - clear and shallow waters - perfect for families
Our destination was Karpathos, reached via little flight from Athens (or a 9 hour ferry journey if you have a the time).  Karpathos, unlike it's bigger neighbours, Rhodes and Crete, is very untouristed and is perfect for relaxation.  The mountainous scenery is very dramatic and the beaches or even populated areas contain very little if at all, in the way of bars and music.  Activities centre around beach lazing and taverna eating yummy Greek food.

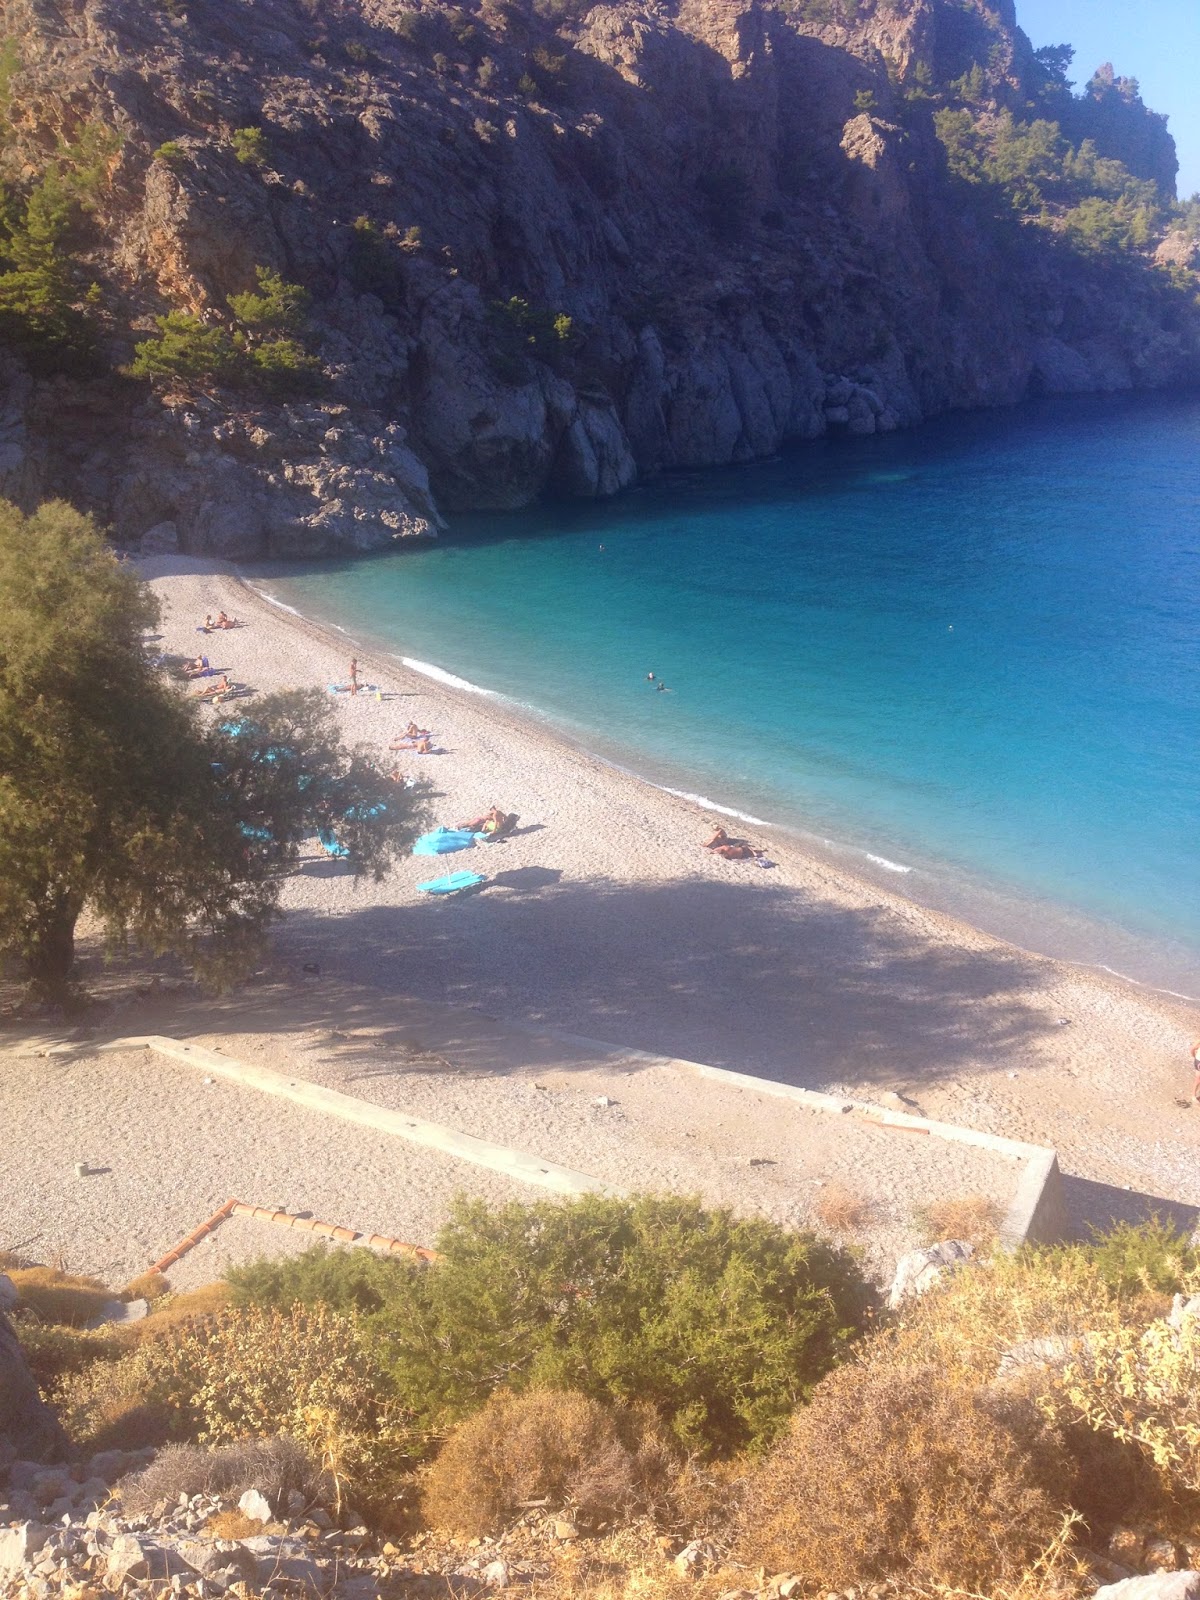
Achata Beach - pebbly with crystal water
Accommodation and car hire is priced moderately and we made the most of exploring a different beach each day. The one above had one small taverna - enough for lunch, and beautiful clear deep water for swimming.


Appella beach just had to be my favourite and is considered to be one of the most beautiful in the Mediterranean - something I can vouch for.  The road to reach this secluded paradise beach was hairy, requiring concentration for the hairpin bends and sheer cliff drops but was more than well worth it.


Glaros beach is breezy and has nice waves and a taverna with rooms of the same name where you can feast on the best Greek food.  I managed to wear my old me made strapless dress this day.


This shop in the main town, Pigadia, was a cute find and I did a bit of shopping at 10.00 pm on the day I was there.  It's a knitter's dream.


Popi's Studios in Arkasa where we stayed had an interesting car park entrance and great studio accommodation at a very reasonable price.

So, after our days of relaxation it was time to hit Athens for a spot of retail therapy.


Obviously, yours truly headed to the fabric quarter which can be found just off the main shopping street (Ermou) in a little road called Kalamioutou.

There's easily about 15 shops there with varying fabrics and something for every pocket.  It was kind of difficult to control myself but I managed quite well, only netting about 9 pieces of cloth in varying sizes for about 85 euros.

Said cloth
The yellow check taffeta was an astonishing 2 euros per metre so I bought 3 metres for a vintage style dress.  In the top right hand corner is some gorgeous Japanese style stretch cotton and my other favourite is bottom right, a heavy cream shaded wool with gold slub - perfect for a winter skirt.  The most expensive was the copper brocade at 18 euros per metre so this concoction will have to be thought about wisely before cutting ensues.  Mr P even gained 2.3 metres of striped brown wool for some 1940s trousers.


Yes, Athens definitely has a slice of fabric heaven.


So many rolls!  fortunately for Mr P there are lots of lovely little bars and, when you do get hungry, restaurants nearby so fabric shopping to your heart's delight if you're with your non-sewing other half, if definitely a possibility!

 
Karpathos resident
This shop in Ermou Street had a mind blowing amount of buttons.

Well methinks now I have a respectable amount of fabric to see me through winter sewing days, but have already booked next year's flight so that I can stock up on fabrics and have more Greek Island relaxation.  Who knows what material goodies will be on offer next year.


A final 2014 memory of Greece to keep me going through the winter months.

Happy sewing

Linda x


Wednesday, 20 August 2014

The Second Lekala 4276 - Peplum Top

I was so pleased with my Lekala 4276 sewn for the Monthly Stitch's Monosewn Challenge that I decided to use the same pattern again for a long-desired peplum top, made with some lovely grey spot fabric from Ditto in Brighton.


This Ditto fabric has a lovely feel, having a slight amount of elasticity in it but I did have to ponder a while on what to actually do with it.


First came the buttons.  This beauts were found at a little sewing emporium just over a stone's throw from my sewing room.  I just loved the zingy colour.  Secondly a lunchtime rummage in one of my "local to the office" thrift stores turned up a soft cotton poplin shirt by East.  It was the perfect colour to use with the grey spot fabric and give it a lift and, being a size 18, had a generous amount of fabric I could cut into , a bargain at £2.99.


I opted for orange on the midriff and collar which, together with the buttons, gave a good amount of fabric mix and eye popping colour to the top.

I self drafted the peplum and have recorded the tutorial here for anyone tempted to have a go.

There's not really too much to say about this make.  I omitted the back zip, opting for the button back and added a placket - 2 in fact - to go down either side of the back, which I interfaced to give more sturdiness for the buttons and buttonholes.


I'd only purchased five buttons so the bottom of the peplum splays a little but I kind of like this as opposed to being just a "straight buttoned top" as it gives a bit more detail.  I also faced the top with half version of the front and back pieces as opposed to fiddly little facings and it seemed to work well.


My previous Monochrome Lekala didn't have a collar so it was fun to play around with the collar on this make, but I did end up sewing part of the collar into the shoulder seam, hence the spot fabric showing around the front of the neck (also due to understitching), but again, I like this detail.....


Note matching accessory
This is the only Lekala pattern I've used so far but I'm really impressed with the fit and would definitely consider another one!  Hey guys - do you need a pattern tester???


The peplum had it's first outing on a shopping trip to Brighton and did dance a little on windy Brighton beach, but you can't complain with so much zing!


If you like the idea of discovering Brighton and it's wonderful vintage boardwalk you might like to take a look here and plan your visit.  ..... and think of all the fabric purchasing opportunities.

Hem does need a little restitching here
I don't think this will be the last Lekala 4276 that I make so watch this space - maybe next time I'll include the keyhole in the pattern  Whatever it is you can be sure it will be a fun design.

The basics:

Ease of sewing - 5 out of 10 but only because I constructed my own peplum.

Cost:  1.3 metres of spot fabric at £7.99 per metre, £2.99 for the thrifted top and £1.75 for the buttons.

Go on, have a go at the tutorial and show off your makes.

Happy sewing

Linda x

Wednesday, 23 July 2014

Pretty in Prada

What a busy month it's been.  Here's the second "Lyndsey" dress - a bit long in the making due to fitting in a few of my own makes - oops, sorry Lynds!


This gorgeous fabric was purchased from Brighton stalwart Ditto Fabrics as one of their ex- designer fabrics, Prada no less!  It's a lightweight metallic slightly stretch fabric and the colour I'm thinking is nearest to describe it is pewter.

Not sure of what form the dress would take, we opted for 2 metres at £7.99 per metre (£7.99 per metre for (ex) Prada fabric - bargain!


Lyndsey has a love of drop waist dresses so I cut a straight simple dress pattern (omitting bodice darts) to the hip and then merged it with a skirt pattern cut in a handkerchief style.  To construct the skirt section I measured around the bottom of the top (if you get my drift) and then measured the top of the bottom, i.e. where the skirt fits onto the bodice, and modified the skirt at the join so both were the same measurement.  The rough sketch below shows how this was done. 


Due to the neckline being rather wide I added in three small darts (as shown above). I've now used this method a couple of times to make a neckline smaller as it seems to work a treat and cuts out the question - now what am I going to do? - when you discover your neckline is too wide. 


The complete mare part of the whole operation was fitting the bottom of the zip.  Not usually a difficult exercise but somehow the fabric decided to stretch itself and thus there ended up a bit of bagginess around the bottom of the zipper.  I unpicked twice, which in itself proved to be another problem as the delicate nature of the fabric meant it didn't like being sewn and unpicked and I was fearful of holes appearing. I re-sewed the zipper but in the end had to take in the dart at the back to take up the extra fabric, so I'm not 100% but, in the end the fabric could take no more amends and I had to slipstitch the slight amount of fabric that wasn't sitting right.


I'm wanting to say the fabric is "tissue-like" in nature and not very robust - but then when could Prada fabric ever be described as robust?  Hence, I decided to line it and, after checking out several fabric shops and not not finding a good match, had a rummage in the loft and came up with this tartan lining.


It gave just the right amount of weight once sewed up as a second dress. I used the technique from my Feminine Wardrobe dress to insert the lining and hand sewing the turning openings at the shoulders once the lining was fitted in place.

After an easy time hemming the handkerchief style bottom of the dress it was time for the fun bit - a little embellishment.  In this case a length of satin ribbon attached to the join with a bow finish. 


Give us a twirl.  Lynds loved the dress and decided to wear it as soon as it was handed over for a Tapas dinner date.

Have you sewed anything for anyone recently?

The details:-

Ease of sewing:  Fairly straightforward - 4/10 difficulty level.  Just that pesky fabric which kept threatening to stretch at the zipper.

Cost:  Fabric:  2 metres at £7.99.  Lining from stash and a bit of ribbon decor - 45p  Not bad for a Prada (fabric) dress!

Happy sewing.

Linda x