Tuesday, 29 July 2014

Monochrome Lekala 4276 - A Daisy for Daisy

I keep surprising myself with how many new projects and initiatives I can incorporate into my sewing life and my latest post proved no exception when I decided to include myself in The Monthly Stitch's Monosewn Challenge


For those of you not in the know, the Monthly Stitch is the baby of 3 talented ladies (Kat, Mel and Juliet) who you can read about and link to here.  The idea is to share ideas, inspire and give yourself a goal, as well as reading lots of lovely blogs along the way. 

So, back to my efforts. 


I recently purchased my first PDF pattern (gosh, more firsts!!) from Lekala patterns and was excited when it dropped in my inbox.  Printing was easy peasy on A4 sheets and I soon had the pattern made up in greaseproof paper. 

The fabric was obviously meant for moi - a find on a trip to Brighton's Fabricland , which I spotted almost as soon as walking through the door.  DAISY print - can you believe it?  It's rather a soft satin cotton and I'm wanting to say it feels like a soft lint duster, but it was easy to work with and that's a good thing, right?


The dress was straightforward, being a sleeveless shift, but I'm afraid, in my eagerness not to miss the end of July deadline for the challenge, I did make a bloop.  As you can see here, the ribbon I added to the seams on the bodice did not quite make it to matching.  I think I'll unpick a little and have the ribbon matching, even though it won't be on the seam as this will be less noticeable.


I did, however, manage to fully line the dress with the same fabric, catching the zipper in between the lining and shell and neatly sewing the neck and armholes complete with understitching to give a flat finish. 


Modifications to my Lekala 4276 were not including the keyhole, leaving off the collar and cutting the neckline wider as I find  boatneck  styles much more flattering. 


The back vent was included in the pattern and makes for ease of walking, especially useful in a fabric without stretch!

I did actually already cut this pattern out as a top to use with some fabric from my Barcelona haul but as it wasn't monochrome it's had to patiently wait in my sewing cupboard until I have the time to get around to it. 

Overall I was really pleased with my Lekala pattern and my Daisy Dress and think it will be getting much wear while the weather stays in heightened temperatures. 

The basics:

Ease of sewing:  Dresses always seem easy so I'd say 4.5/10 with the lining to construct. 

Cost:  2 metres of daisy fabric at £3.99 per metre + 75p zip and £1.10 for the ribbon. 

Thank you to the Monthly Stitch ladies for allowing me to be part of the community.   Why don't you pop over and see the great makes there and get some inspiration?

Happy sewing

Linda x

Wednesday, 23 July 2014

Pretty in Prada

What a busy month it's been.  Here's the second "Lyndsey" dress - a bit long in the making due to fitting in a few of my own makes - oops, sorry Lynds!


This gorgeous fabric was purchased from Brighton stalwart Ditto Fabrics as one of their ex- designer fabrics, Prada no less!  It's a lightweight metallic slightly stretch fabric and the colour I'm thinking is nearest to describe it is pewter.

Not sure of what form the dress would take, we opted for 2 metres at £7.99 per metre (£7.99 per metre for (ex) Prada fabric - bargain!


Lyndsey has a love of drop waist dresses so I cut a straight simple dress pattern (omitting bodice darts) to the hip and then merged it with a skirt pattern cut in a handkerchief style.  To construct the skirt section I measured around the bottom of the top (if you get my drift) and then measured the top of the bottom, i.e. where the skirt fits onto the bodice, and modified the skirt at the join so both were the same measurement.  The rough sketch below shows how this was done. 


Due to the neckline being rather wide I added in three small darts (as shown above). I've now used this method a couple of times to make a neckline smaller as it seems to work a treat and cuts out the question - now what am I going to do? - when you discover your neckline is too wide. 


The complete mare part of the whole operation was fitting the bottom of the zip.  Not usually a difficult exercise but somehow the fabric decided to stretch itself and thus there ended up a bit of bagginess around the bottom of the zipper.  I unpicked twice, which in itself proved to be another problem as the delicate nature of the fabric meant it didn't like being sewn and unpicked and I was fearful of holes appearing. I re-sewed the zipper but in the end had to take in the dart at the back to take up the extra fabric, so I'm not 100% but, in the end the fabric could take no more amends and I had to slipstitch the slight amount of fabric that wasn't sitting right.


I'm wanting to say the fabric is "tissue-like" in nature and not very robust - but then when could Prada fabric ever be described as robust?  Hence, I decided to line it and, after checking out several fabric shops and not not finding a good match, had a rummage in the loft and came up with this tartan lining.


It gave just the right amount of weight once sewed up as a second dress. I used the technique from my Feminine Wardrobe dress to insert the lining and hand sewing the turning openings at the shoulders once the lining was fitted in place.

After an easy time hemming the handkerchief style bottom of the dress it was time for the fun bit - a little embellishment.  In this case a length of satin ribbon attached to the join with a bow finish. 


Give us a twirl.  Lynds loved the dress and decided to wear it as soon as it was handed over for a Tapas dinner date.

Have you sewed anything for anyone recently?

The details:-

Ease of sewing:  Fairly straightforward - 4/10 difficulty level.  Just that pesky fabric which kept threatening to stretch at the zipper.

Cost:  Fabric:  2 metres at £7.99.  Lining from stash and a bit of ribbon decor - 45p  Not bad for a Prada (fabric) dress!

Happy sewing.

Linda x

Monday, 14 July 2014

Butterick Retro Dress - 6582

Before I review my most current finished project I have a couple of things to mention.

First off I'm surprised to find I've been nominated for the Versatile Blogger award by Kychristine. How lovely, - I still can't think my blog is that interesting  to other sewists out there, but thank you very much Kychristine.  Of course I'll try to re-nominate other bloggers but squeezing this into my busy schedule may take a little time.  In the meantime pop over and take a look at Kychristine's blog - she has some fun stuff there and of course, you can see all the other nominated bloggers.

Secondly, I've put myself up for the Vintage Sewing Pattern Challenge as organised by A Stitching Odyssey, where the challenge is to make five vintage (or vintage style) garments before end of the year. Luckily my first vintage style dress was in the making when I found this blog post so I had a head start on myself.

I think it was seeing all the other vintage makes by talented dressmakers that spurred me to on try a bit of vintage myself.  That and the Mad Men Challenge by Julia Bobbin.  I'm definitely a sucker for a bit of a wiggle dress and a pair of kitten heels and already had a dress shape in mind when I went for a forage at Walthamstow Market back in May. 


What I found was some duck egg soft cotton satin that, on the roll, definitely had a look of wallpaper. At only £2 a yard it was a steal and I only needed 2 yards for what I had in mind.

 View A was the dress of choice this time
It had been ages since I used a commercial pattern.  I'm so used to my trusty Burda and Patrones and the way they work with my greaseproof paper trace-outs.  I thought the pattern pieces would fly away, they felt so delicate.  Hence cutting out took a little long than usual and with the front of the dress being asymmetric more room and concentration was needed too.


Construction was of intermediate difficulty with the challenging part being sewing the left bodice front as 4 layers.  Understitching was used to keep the neckline tidy and the facings were attached as per a sleeveless lining and then handstitched at the shoulder opening.


Not being one for making toiles -(something else I must get to grips with!) I stitched it straight from the pattern pieces and ended up taking in the dress at the side seams and darts and, my, did it take a fair bit of tweaking,  mostly at the darts.  It came up a bit large in the back and Mr P had to get handy with the pins to fix the darts and take in the zip at the back.

Once all the amendments were done a try on saw a good fit but then, horrors!  I decided to photograph my dress mid make and realised that the upper left front was cut from a piece of discoloured fabric. Ouch!


How did I not notice that?  

I realised a lot unpicking would be required to remove the offending bodice piece and, at that point, lost my mojo to complete the dress and it lay, unloved, consigned to the sewing cupboard, as an unfinished item. 

Three weeks later, and being spurred on by a dinner date, I decided to tackle the mishap and, once the dreary unpicking was done, had a new bodice in in double-quick time.

The remainder of the sewing went without incident and to finish I added bows, as per the pattern, on the shoulder 


I'm wasn't totally convinced about the shoulder bows as they seem a bit rigid, but they were press-studded on and I've now removed them and will make a lingerie guard type addition, but one that I can remove and press stud the bows to so I can wear it without if desired. I may also make new bows so they don't look quite so "boardy.  Also if I made this dress again the other thing I'd do is put a lining in, especially with such a soft fabric as I think that addition would give it a better hang.

The dress on it's dinner date 
All in all, I was pleased with my first attempt at vintage and will probably be using my Butterick 6582 at some point again, though probably with a full skirt next time

If you'd like to check out the Vintage Sewing Pattern Pledge there's a Pinterest Board here so you can keep up with the vintage makes.

If you're near Brighton the Scicilian restaurant visited by me and the dress is Mediterraneo Deli - very intimate with all home cooked food and tons of ambience.

Finally:

Ease factor:  Intermediate. 5 out of 10.  Some experience needed here.
Cost:  Bargain 2 yards at £2 per yard from Walthanstowe Market, but obviously seconds so if you buy from the man outside Sainsbury's, it's good value but check the print to make sure you have enough good fabric.

Have you sewed any vintage?  I'd love to know.

Happy sewing.

Linda x


Wednesday, 9 July 2014

A Little Sewing Skirt and Mini Giveaway

After finishing the second "Lyndsey" dress and almost finishing my 50s inspired wiggle dress this last weekend I ended up staring hard at my fabric box and thumbing through pattern books waiting for the right inspiration to strike.


Eventually I got a tap on the shoulder as opposed to a thunderbolt and decided to make one of my "on the list" from recently purchased Patrones - a wrapover skirt with pockets and tie front as seen here, number 16.


I chose some fabric purchased from Fabricland in Brighton, originally for a dress but deciding it would look good as a skirt as I have some khaki separates that would go extremely well with it.  That and I just couldn't resist the cute print!


Making up was easy peasy, sew pockets in, add gathers, sew side seams and then add on the waistband which I cut on the bias to give a slightly different angle to the way the fabric looked.  I still needed a little more of a challenge than simply sewing on the waistband and so, after a further rummage, picked out some cobalt blue satin to make some piping and pick up the colours in the fabric pattern.  This simple addition adds to the garment and defines the waistband from the rest of the skirt.

Oops, must remove that tailor's chalk mark
A large vintage button and a couple ties finished off the skirt and, to save my blushes, I quickly squeaked out a lace underskirt - a simple tube with one french seam at the back, an elasticated waist and a scalloped edge.


To save topstitching showing (and also having to sew around a curve) I decided to finish the hem with a 4 cm self facing which I traced off the main pattern as a separate pattern piece.


Thank goodness for the lace underskirt - bit breezy on Blackheath Common
Completed on Thursday night, Friday saw me showing off my new make for lunch at Blackheath in London. Hmmm, lunch in London seems to be becoming a bit of a post sewing habit.

So, now to the giveaway which is the skirt pattern and a remnant of the fabric used.


The double part of the remant (i.e. 150cm wide) is 60 cm in length with the total length being about a metre.  It's a standard poly cotton mix, enough for a small strappy top or maybe if, like me, you like to mix up fabrics, you can use this with another fabric.  See my Hello Flower dress here for ideas.  The skirt pattern is european size 40 and this is what you will get, although as it's a wrapover, this can easily be adapted.  Also the instructions are in Spanish so I don't usually use them.  If you read Spanish that's fine but if not,  it's not tricky to put together if you have some experience.

If you'd like to win (either the pattern, the fabric or both) just drop me a comment at the end of this post and the winner will be chosen at random on Friday 18 May. Please remember to include a link so that I can contact you.

P.S.  Edition of Patrones not included - I haven't finished making stuff from it yet!!!

Now the basics:-
Ease factor:  Straightforward, nothing to confuse here (I really must challenge myself!)
Cost:  Approx £3.60 per metre and I used about 2 metres with some leftover as you can see.

OK, another post wrapped up........

Happy sewing

Linda x

Saturday, 5 July 2014

A Top of Many Frills

As my blog followers will no doubt know, I love a frill or two (or more), but this garment wasn't necessarily on my list of makes post May as I'd planned to construct more comfy cozy stuff.

A frilling tube ride
So, what happened?  I was hit by a bolt of inspiration on our last day in Barcelona when a hotel guest where we were staying showed her chicness in a frill top and cropped pants.  A shopping trip to my local fabric store saw me purchasing this cerise, pink and grey sale fabric at £5.99 per metre, as I was sure I could knock something up from a metre of this not so easy to work with georgette at some time in the future.

In the meantime, however, a friends birthday saw me on my usual last minute hunt for presents and finding a pattern in Patrones number 269, pattern number 3 by Oxy Coky I dug out some leftover fabric from my Flower Dress and set to work on a handmade present.  Not knowing the gift receiver's size I did a bit of guesswork and the pattern very helpfully allowed for an element of under and over sizing. I added a stretch back to give more variation and it came together well. 


So, back to the frills. Loving the gift I'd made, I decided this pattern would be ideal for the georgette fabric as I could modify to my heart's content on making a garment that fitted my frame.

I cut out the basic pattern and then simply added four frills which I measured out at 1.5 long x the width of the top x 12 cm depth (the frills are on the front only).

Someone wasn't impressed with cutting out!
I started off by stay stitching each frill hem 0.5 cm from the edge to stabilise the georgette which made it easier to handle the hem and also didn't require me to press first which is a complete mare with georgette. Once the first layer of hem was stitched it also made it easy to turn over the fabric into a double hem.  I then removed the stay stitches.


After hemming and gathering the bottom three frills were attached to the bodice starting with about an inch under the armhole to leave space for binding the armhole edge.  These were then sewn into the side seam. The top frill was placed 10cm above the frill sewn into the side seam and I hemmed the side of this frill so it hung free as opposed to being encased as this would have spoiled the hang of the frill, the armhole being curved.


As the pattern of the neckline was slightly wide I adapted it with three small darts to give it a good fit.

Once the frills were attached I finished them off with some matching ribbon along the edge of each frill, which required some careful trimming of the seam attachments and then bias binded the neck and armhole edges.


Here it is getting it's first outing with my Right Trousers.  I just love those frills - they give the top great movement and feel very feminine.  This is a garment that can be dressed up or down so it's going to be a much worn and useful addition to my hand made wardrobe.

Ease factor:  6 out of 10 the basic top is fairly easy - any basic vest shape can be used.  Frills require a little patience but worthwhile persevering.  Georgette also a little fiddly to work with but staystitching helps enormously.

Cost:  1 metre of georgette - £5.99, ribbon 80p, binding £1.10 so, about £8.00

Go on - frill yourself.

Happy sewing

Linda x

Wednesday, 2 July 2014

Sewing Around A Curve

As mentioned in my post "Frills - Definitely a Learning Curve" I've posted below my tip on how to manage a curved hem/seam - in this case a patch pocket.

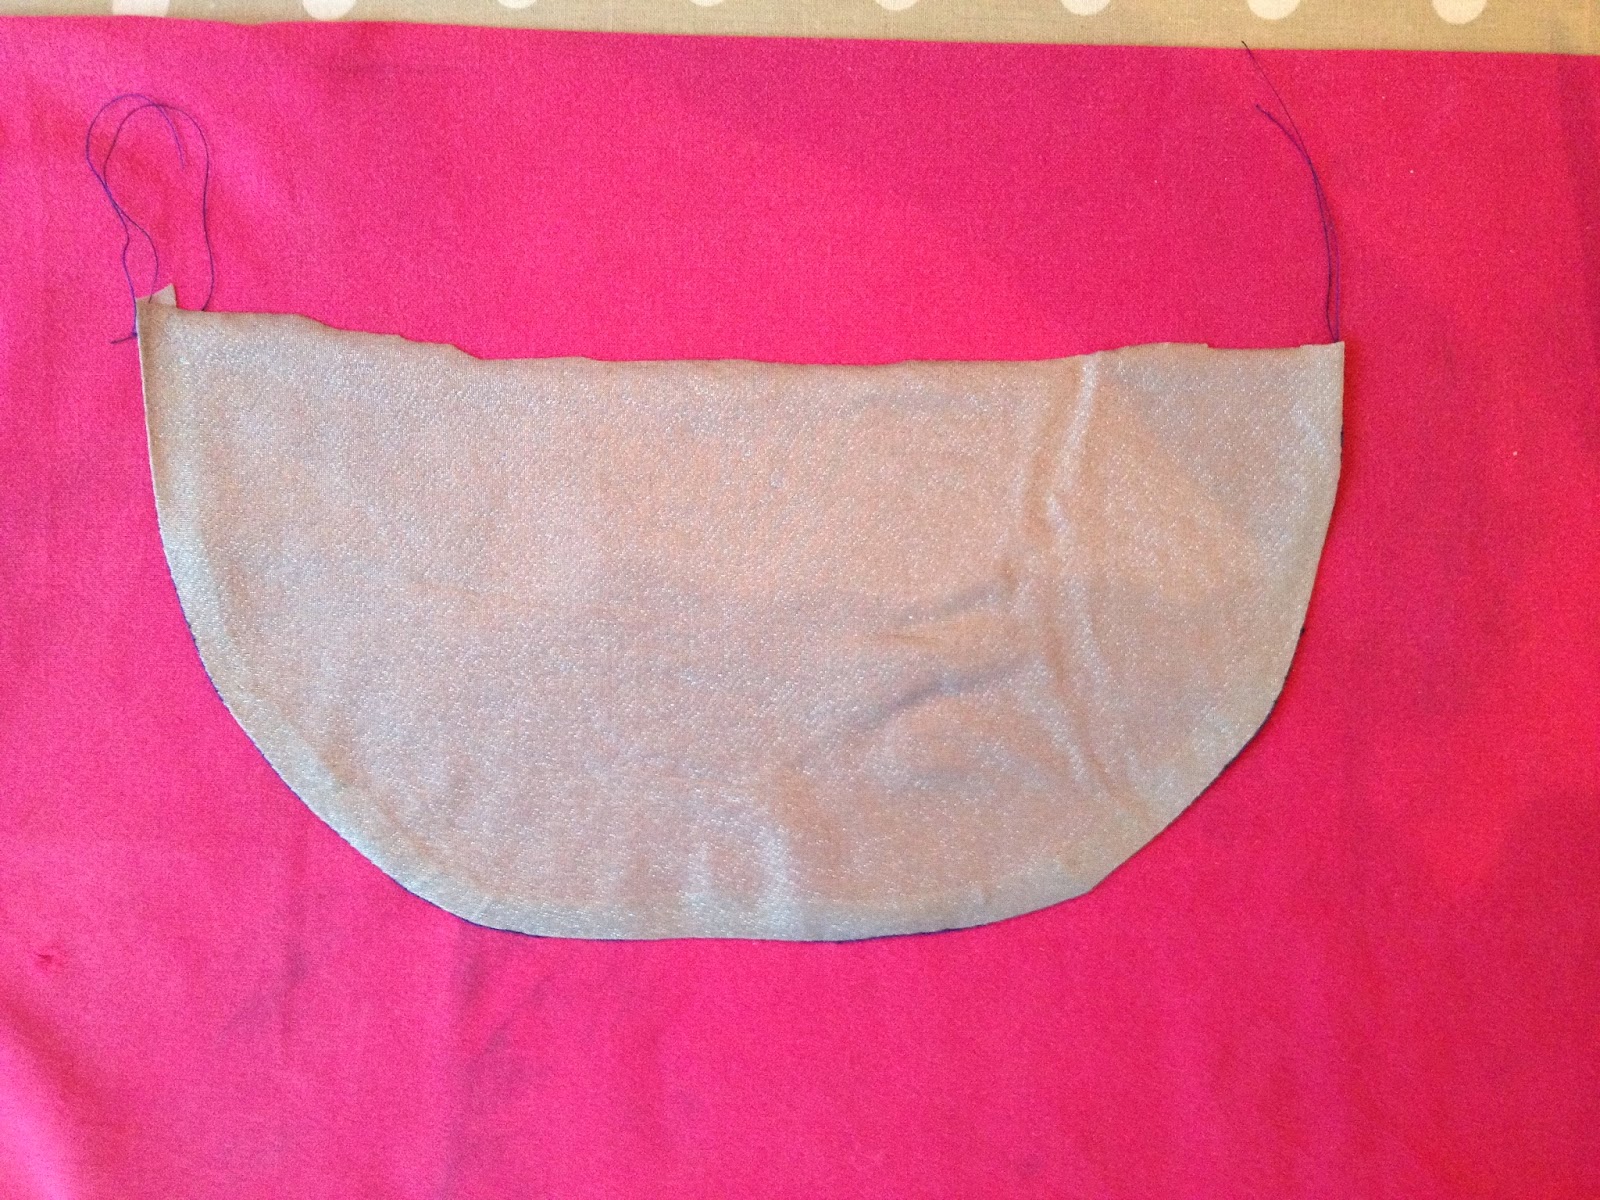
Firstly, stitch around the edge of the curve you wish to hem, about 5/8" of an inch from the edge.  I've sewn this one in a darker colour to be able to see the stitching.  I've also used the longest stitch length.


The press the curve in following the stitch line (I did a lot of this for my plum coloured frilled dress!)
Tip:  This fabric pressed easily but if you have fabric that's a little more difficult and you need to use steam, wear a rubber glove to stop your finger getting burned.


You should end up with an nice flowing curve


If necessary the thread can be removed (easier if you've used a longer stitch length) if it's showing after being sewn.